

Scootering technique
| Vendula KosíkováYou have surely heard from us already that scootering is an utterly healthy kind of movement that involves the entire body – from the feet to the lower limbs, the torso, hands and shoulders and the head. But how to perform it correctly? We have asked a highly qualified expert – world scooter champion Michal Kulka.
A small test to begin
“Let us take a small test to begin: Stand straight, grasp an imaginary handlebar in front of you, approximately on navel level. Then push off for a while on the spot, with one leg straightened in the knee. Which muscles are you using?

Now try once more, but when pushing off, raise a bent knee up high. Involve the foot in the movement, too, by bringing the tip of your foot up towards the shin. Which muscles are involved in the movement now?

The abdominal muscles or the lumbar muscles?
You surely felt that when pushing off with a straight leg, you mainly involve the muscles of the lower back area. If you kick back the leg in addition and bend your back backwards, you may be causing yourself problems with the spine.
However, by raising the knee you activate the intrinsic stabilisation system and the abdominal muscles. If, while raising the knee, you will also pull the handlebar toward you, you will involve the belly muscles some more and you will also include the supporting leg in the movement, which will automatically get to stand on tiptoe.
A great difference, isn't it? We should therefore pay due attention to every detail, because even a small change in how the movement is conducted has a great impact on which groups of muscles are involved in it,” says Michal Kulka and explains:
“For example: by involving the tip of your foot sole in the movement, too, you activate the leg, dividing the push-off power between the thigh and the leg, which protects your knee joints and the arch of your foot.
The movement should be fluent and economical. Economical movement is a sign showing that you are doing it well.”
But let us take it from the beginning.
Posture
It will help your upright posture, if you set the handlebar up to the height of your hips, navel, or ski poles.
For riding around town, fitness rides as well as trips, the upright posture is ideal, while also being the most comfortable one. Easily – almost as if you were walking….
The riding technique is the same, whether you are zigzagging through the city, covering kilometres on the cycle track, or sprinting on the race track. The movement only differs in scope.
The construction of the scooter is based on the scope of movement, too – city scooters are short, race scooters offer more space for the rider and are thus adjusted to maximum movement.
Stand in the centre of the footboard, or closer to the rear wheel – if you are taller. Place the foot parallel with the footboard and hold the handlebar without any unnecessary tension.
The weight, which rests on the supporting leg, moves above the rear wheel during push-off. It is similar to waiting for someone to pass the ball to you. You may still remember that from school.

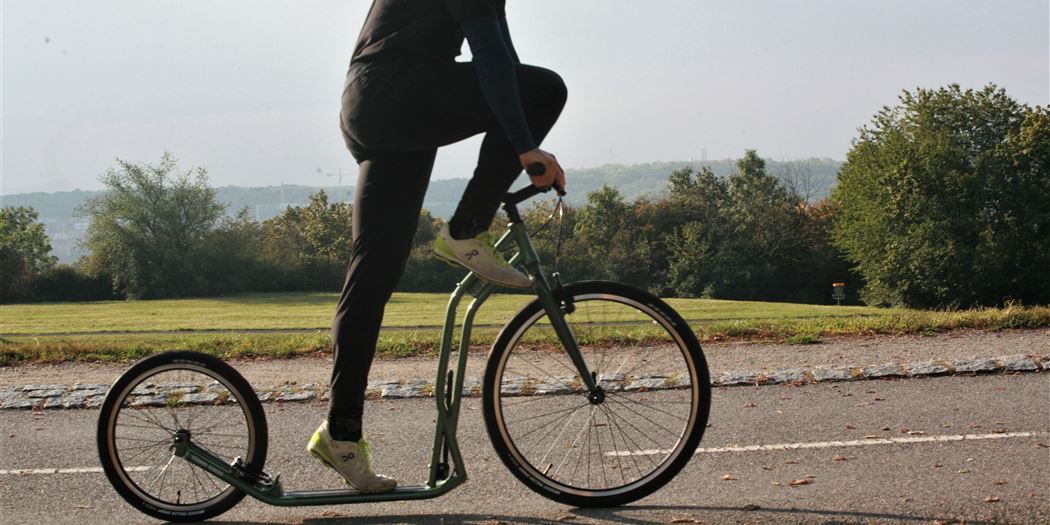
Work of the kicking leg
By transferring your weight onto the supporting leg, you will release the kicking leg, which you will bend in the knee and raise to the level of the handlebar (somewhat less in the city). Never mind, how you look when riding, the important thing is that you use the internal stabilisation system and your abdominal muscles. On the contrary, be an inspiration to others with your active riding style.

Along with raising the kicking leg, bring the tip of your foot up towards the knee, in order to involve the thigh and the muscles, which control the movement of the foot (the part of the lower limb from the ankle downwards) in the movement too.

Conduct the foot so as to land with the front third of the foot sole, below the centre of gravity of the body, approximately on the level of the heel of the supporting leg, or slightly behind it.

The heel, the torso and the head should remain aligned along one axis/ plane. Avoid kicking the leg back too much and bending in the low back, which has a negative impact on the sacroiliac joint and the discs.
Keep your head relaxed, facing forward, do not tilt it back or look down underneath you, because you might overlook an approaching obstacle.

Look at the movement of the kicking leg in a slowed-down video
What does the supporting leg do
At the moment, when the kicking leg touches the ground, bend the supporting leg in the hip and shift your weight above the rear wheel. This will ensure that the bent knee will not get in front of the tips of your feet, which might overburden your knee joint.

Along with raising the kicking leg up, the supporting leg is straightened and in fitness rides or during races, it comes all the way up on tiptoe. The knee should not be tilted sideways or pushed too far back.

Work of the hands and arms
In case you shift the weight of your body to the handlebar, you will make the upper part of the torso fixed, similarly as when riding a bicycle, in one position, thus unnecessarily overburdening the back, neck and the throat area. Muscles that are tightened up for a long time become shortened and lose the ability to relax. The low back muscles suffer, too, because this type of movement does not enable involving the deep stabilisation system.
During push-off, you actively push the handlebar away from you and when raising the knee, you actively bring it back toward you again. During the entire time, the arms are in motion, stretched with a slight bend in the elbows, do not do any push-ups and do not pull your pelvis to the handlebar – this would overburden your back unnecessarily.

Switching legs
On flat ground, it is enough if you exchange legs after six push-offs, uphill it should be earlier - every 3 to 4 push-offs will be ideal. Switching is done by shifting the weight of the supporting leg onto the heel and turning the tip to the side (the right one to the right, the left one to the left). You place the tip of the free foot in the vacated place, transfer your weight onto it, thus releasing the supporting leg, which fluently continues into push-off.
Riding uphill
Riding uphill will be significantly easier for you if you shift your weight as far back as possible - above the rear wheel, tilt slightly backwards, look up on the horizon, push off shortly and quickly and switch legs frequently. The ride will be fluent and noticeably less demanding.
